Posts from the ‘Tools’ Category

Moving Right Along

Well, I figured out what I was doing wrong with the Count Your Blessings block.  Somehow, I had managed to get an extra row into the first set of repeats.  That put me off the pattern.  Once I began keeping closer track of my rows, I was able to finish the block perfectly.

It also gave me a chance to use a handy tool that I’d picked up a couple years ago for the first time.  It looks like a folder, but it’s made of cloth covered metal plates.  Using magnetic strips to keep the page in place, you can mark your place in the pattern.  It worked beautifully and was well worth the investment!  I got mine from KnitPicks, but I’m sure they are available elsewhere.  If you are a crafter who uses patterns with more than a few rows, it is something very useful to own.

Currently, I’m working a seed stitch square (to remind us of the parable of the seeds planted – we’re meant to be the sort that grow in good soil).  I love the philosophical way that the pattern was presented.  If you make a mistake, the author says, and knit where you should purl (or vice versa) to make the seed stitch… well, the parable says that not all the seed grew.  That’s fine!  What a cool way to look at it!

I did make one mistake, but I just kept right on going.  It means there will be a space where the square is stockinette, rather than seed stitched.  The square won’t be perfect, but it will serve as a duel reminder.  One: I want the seeds of God’s word to grow.  Two: I’m not perfect.  Sometimes, I make mistakes, but that all right!
Pompoms!

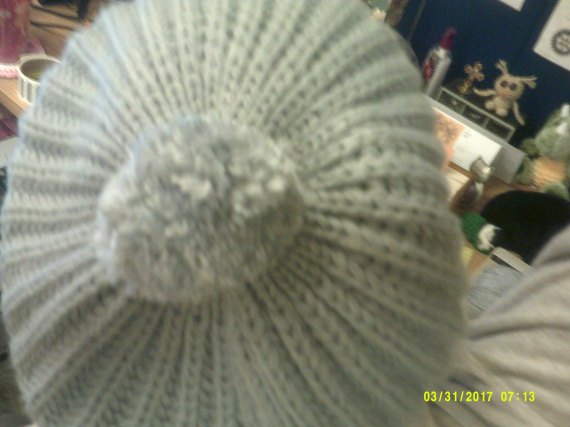
I recently picked up a slouchy beanie type of hat at the craft store.  It’s great and warm and comfortable.  It also matches my coat and other winter accessories quite well.  However, it was lacking something.  It needed a pompom – a little fluffy ball for the top to really complete it.

So, I pulled out a yarn that was a close match in color and my pompom maker.  I can remember making pompoms when I was a kid – using those little cardboard circles and fighting to get the yarn into them the right way.  My pompom maker is so much easier than that!

It has two plastic “wings” on each side of a metal pin.  You wrap the yarn around one pair of “wings” until it’s very thick.  Then, you do the same for the opposite pair of “wings”.  You close up both “wings” and cut the yarn along a little groove.  Then, you wrap yarn through the grooves and open the “wings” back up.

At this point, the pompom maker can come apart and you can tighten the wrapped yarn down.  Once you tie a knot, you have a fluffy, perfect pompom.  It took several tries before I got enough yarn into my pompoms to make them look right.  However, now I doubt that I’ll ever by a premade pompom again.  The best part is that you can make pompoms to match projects – because you can just use the same yarn for the pompom as you did for the rest of the project.Digital Camera

The Rhinebeck Sheep and Wool Festival

For the last several years, my sister and I have gone to the Sheep and Wool Festival in Rhinebeck, NY.  Now, generally, I’m not one of those people who is very elite about the yarn I use.  In fact, most often, I use acrylic yarns and cotton yarns.

Part of the reason for that is… I have a strange reaction to handling 100% wool yarn: my fingers go numb.  My theory for this is that the wool is processed in something to which I’m having this reaction.  That means, I generally stick with the alpaca wools and angora wools when I go outside of the acrylics and cottons.

Over the years, I’ve focused on getting tools: a nostepinne, a yarn bowl, a nalbinding needle.  Last year, I got safety eyes and two kits, as well as a couple skeins of yarn.

This year, I got some merino wool.  I didn’t have the immediate reaction to it that I normally do, so I’m hoping that I’ll be able to make something nice out of it.  I also picked up a few little odds and ends – buttons and some tools.  I also got a kit from a vendor that I visited last year.  I’m hoping that I’ll be able to get some more of her kits going forward.  They’re intended for a baby doll that she also has a kit for, but the hat I made last year fits my 14 inch doll quite nicely.  I’m hoping that the vest I go this year will be the same.

My sister and I went both days and Saturday was really packed and busy.  It meant we spent a lot of time rushing and buying things before they sold out.  Sunday was much less busy, so it was nice to be able to just take my time and look over things.  That’s part of the reason why I like to go both days.

My goal for this year is to use up the skeins that I’ve gotten last year and this year.  I also want to make the doll vest.  Next year, I want to visit that vendor, provided that she’s back, and get some more of her kits.  I’d also like to look into Russian spindles this year.  If it looks like something I can do, I might pick one up next year, along with some wool to spin.  (I don’t react to roving, which is why I think it’s something in the processed wool to which I’m reacting.)

Nålebinding Left-Handed…such fun!

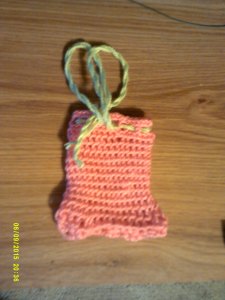
So, I finished my first nålebinding project.  I’m really pleased with how it turned out.  It’s not perfect, but it was just for practice anyway.  You can actually see, looking at it, when I started to get the hang of working with the needle and doing the stitches.  For me, that’s pretty neat.

Digital Camera

Not bad, for a first try…

I’m left-handed and I could only find instructions for how to do the Oslo stitch right-handed.  One of the sites I visited even went so far as to say that you had to work in the clockwise direction.  As someone who knits and crochets left-handed, I’ve reached the point where I know… what I “have to do” is make the stitches look right.  The exact process I use to make the cloth is subject to what is comfortable to me and what works best for me.

Ultimately, my right hand was simply not coordinated enough to work the needle properly.  I also sew left-handed, so that wasn’t too surprising for me.  After the first couple rounds I gave up forcing myself to use my right hand to work the needle and turned the work upside-down, worked counter-clockwise and had the needle in my left hand.  After that, things went much faster.  I’m going to have to video myself for people to really see how it works and it might not work for the foundation round, but it worked for all the successive rounds, so I’m not bothered by it.

I’m going to try making some other things and experiment with smaller needles or bulkier yarn.  Then, I might move on to some of the other nålebinding stitches.

By the way, I added three rounds of crochet to the top of the bag, just to have a place to thread the drawstring.  The fabric is so stretchy that I didn’t feel comfortable threading it through the fabric itself.

I’m Doing It!

My goal for this week was to begin nålebinding.  Well, I looked for a few resources, but I was limited, because where I was working I couldn’t watch videos.  That meant I could only use pictures and written descriptions.  I found three sites that I used to begin:

Basic Naalbinding  Basic Nålbinding  and Oslo Stitch Pouch (where I got my first “pattern”)

Using the written directions on these three pages, as well as the images on the first two, I was finally able to figure out what I was meant to be doing.  I’ve completed the first two rows of my Oslo Stitch Pouch and I’m ready to begin the third (of twelve).  It took me about an hour to get this far, but that was after several false starts.  The second round only took about fifteen minutes.

What I’ve got so far has very loose stitches, because of the size of my needle and the size of my yarn.  However, when I make my next project I’ll either go up to a bulkier yarn or use one of my other, smaller needles.  This is just a practice project anyway.

How would I compare knitting and crocheting to nålebinding?  I think it’s a bit harder than crochet, but easier than knitting.  The fabric is really quite different from each of the other crafts.  I’m looking forward to seeing what else I can make.  The only real downside is that with nålebinding, I must use short pieces of yarn (about 18 inches or so), so that means a lot of joining.  Still, I quite like it, because I just need scissor, yarn and a needle.  With crochet and knitting, I usually need a sewing needle along with my hook or needles, in order to tuck in my tails.  It’s one less thing to carry and one less thing to lose.  Even though I’m making this first project with my proper nålebinding needle, I can see how I could really use any tapestry needle to get the same effect.

Nålebinding

Last year, at the Rhinebeck Sheep and Wool Festival, I picked up a nålebinding needle.  Nålebinding is a type of fiber craft that predates both knitting and crochet.  It’s also called needle binding (a direct translation of the word) or one needle knitting.  It was used in the Viking age in Scandinavia.  However, the term didn’t come into use until the 1970s.

At the time that I got my needle, I was writing a novel whose main character was from Norway.  He had learned nålebinding from his mother and was making something from it during the course of the story.  I decided that, in order to better understand the craft, I should learn how to do it.

Unfortunately, I wasn’t able to learn the craft at that time.  There was simply too much going on that required my attention.  Now, though, I’ve got time and I’m going to put it to good use.  I found a pattern online to make a small bag using what is called the Oslo Stitch.  It’s made in a round of 36 stitches and it’s only twelve rounds.  I figure, even though I still haven’t quite learned what I’m doing, it won’t take me long and I’ll be able to get an idea how to use my nålebinding needle.  Once I’ve figured out the Oslo Stitch, I’ll see if I can find a project to learn some of the other stitches on.  So far, I know of three other stitches.

OMG! I can read Crochet!

For the last three weeks or so that I’ve been working on my Advent scarf, I’ve been using a book as a reference. The book is really well written. Every motif, fabric and edging has both written instructions and a chart, along with full color pictures.

Well, I’ve never been able to read charts. It’s like looking at a foreign language. None of made sense to me. That meant that I was limited to patterns that were written – not charted. I’d encounter patterns written in Japanese online, with charts in the typical crochet symbols. However, since charts were useless to me, I couldn’t use them.

As I’d been working my way through the book, however, the charts began to make sense. Slowly, but surely, I’ve reached the point where I can just glance at the chart and follow that to make the pattern. It’s like this book was a Rosetta Stone for me, giving me the intermediate step between English and the secret language of Crochet! It makes me want to find those patterns I’d passed on before and save them to work on later.

Adventures at the Sheep and Wool Festival!

My sister and I arrived bright and early – at about 8:30 AM. We were on line and ready to go inside the fairgrounds ten minutes later. I was really excited. It was my first Sheep and Wool Festival and my first Ravelry meet-up all in one day.

When they finally let us inside the gates, they made use wait. It was rather amusing to be herded through the gates and then stand there, milling around. It reminded Heidi of the sheep we were there to see.

A cheer went up as they allowed us to move inward. Then people scattered to the four winds. Some went on to see the sheep and alpacas right away. Others headed off to classes or demonstrations. Heidi and I headed off to find the craft vendors.

I don’t think I’ve ever seen so much yarn in my life! Some of it was brightly colored and some of it was natural. There were solids and ombres. There was raw wool, for those who wanted to spin their own yarn. Everywhere, there seemed to be needles and hooks and other needlework tools. There were vendors with spindles and wheels for spinning the yarn. There were even vendors with buttons and yarn bowls (Next year!). Finally, I found someone who had nostepinnes! I looked over his selection and found a nice one for the right price. I’m not the proud owner of a nostepinne! I can hardly wait to use it.

About then, as we wandered through the fairgrounds, we encountered other Ravelers who mentioned Rhinebeck Bingo. Heidi and I found the booth that had the game boards and pins. Then, we set off to find the people on our sheets. It was a great time. I got to meet and speak with so many other Ravelers. By the time of the meet-up, I had three people marked on my sheet. At the meet-up, I got probably six more. I didn’t get Bingo, but I didn’t care. I had my prize already: The best day I’ve had in some time.

What’s a nostepinne?

Nostepinne (also spelled nostepinde) is a Scandinavian word meaning “nest-stick”. It looks like a tapered dowel. Some have a notch or knob at the wider end. A nostepinne is a tool that is used to make center-pull balls of yarn by hand. You make a slipknot in one end of the yarn and loop it onto the notch or knob. Then, you can wind the yarn from the hank or skein around the nostepinne, until you’ve reached the end of the yarn. Once you’ve done that, you loosen the slipknot and slide the ball off the nostepinne. It gives you a nice ball that pulls from the center, so it doesn’t roll around the way a ball that pulls from the outside will.

This is one tool that I really, really want and still have not found. I have, currently, two hanks of alpaca yarn that I need to wind into balls before I can use. I also have… probably a dozen skeins of cotton thread that can only be pulled from the outside. It’s annoying, because the little skein bounces and rolls in my bag, the thread gets caught on things. I also have a huge cone of cotton yarn that, again, feeds from the outside. I’d love to be able to roll the cotton and the alpaca wool into nice, neat center-pull balls.

There are ways to make nostepinnes. I’ve seen people suggest using paper towel rolls or chair legs. However, I’d really like a proper nostepinne, since I think the paper towel roll ones would get banged around too much and the chair leg… I think it’d be too big. One option I might have is that I have small craft cones that I had to use for a Sunday School project a few years ago. I only have three left, not enough for my class. They’re the right size and shape and they’re made of sterner stuff than a paper towel roll would be. I may have to experiment with them to see if they would work.

Yarn Bowl? What’s that?

I’ve been getting back into knitting and crocheting more and more in the last year. I’m now on two websites (Crochetville and Ravelry) that are communities for people in the yarn crafts. One thing I’ve heard about a lot on Ravelry was something called a yarn bowl.

It was easy, from what I was reading, to get an idea what it was like: a bowl that you put balls of yarn in, so that they didn’t wander around when you worked the yarn. However, I always wondered: how do they keep the yarn in the bowl? I’ve tried it with normal bowls and, if the bowl is shallow enough, they bounce right out. If the bowl is deep, it tips the bowl over or drags the yarn.

Today, I finally decided to look them up on Google. OMG! I’ve seen them before, in Michael’s or Joann’s or some craft store. At the time, I had no idea what they were. They’re usually ceramic (so that they’re nice and heavy), deep (to cup the yarn properly) bowls. Here’s the thing: they have slots down the side that curl around (most are sort of J-shaped, some curl around more). The yarn goes into that slot, effectively pinning the ball in place and keeping the yarn from dragging over the side of the bowl.

Now that I’ve seen them, now that I know what they are: I want a yarn bowl! I want a yarn bowl so much that I almost want to buy one right now – like order it today, while I’m at work. I won’t though. I’ll wait until I’m at Michael’s or Joann’s and see if I can pick one up then. Otherwise, I’ll put it on my Christmas list and force my parents to search high and low for something they’ve never heard of before. For now, I’ll just use my little backpacks to tuck my yarn into.